How to Automate Video Creation with Zapier (Step-by-Step Guide)
Automate personalized video creation with Zapier and Renderly. 91% of businesses use video — here's how to set up rendering from forms and CRM events.
Phil Duong
Founder
Your marketing team needs 200 personalized welcome videos this week. Your sales team wants custom outreach clips for every new lead. And your e-commerce store just added 50 products that each need a showcase video.
You could hire a video editor. Or you could build a Zap that does it all automatically — every time a new row hits your spreadsheet, a new contact lands in your CRM, or a form gets submitted.
That's what we're building today. I'll walk you through setting up fully automated video creation using Zapier and Renderly, step by step. No code. No editing software. Just a workflow that turns data into finished videos on autopilot.
Key Takeaways
- 91% of businesses now use video as a marketing tool (Wyzowl, 2026), but most still create videos manually
- Zapier + Renderly lets you automate personalized video creation from any of 7,000+ apps — zero code required
- You can go from trigger event to finished video delivered via email in under 5 minutes of setup
- Personalized videos show 16x higher click-to-open rates than generic ones (Tavus, 2025)
Why Automate Video Creation in the First Place?
91% of businesses use video as a marketing tool in 2026, tying the all-time high (Wyzowl, 2026). Yet most teams still create videos one at a time — open the editor, swap out text, export, upload, repeat. It's a bottleneck that doesn't scale.
The math is simple. If a single personalized video takes 15 minutes to produce manually, 200 videos eat up 50 hours of someone's week. Automate that same process, and it takes zero hours. The videos just... appear.
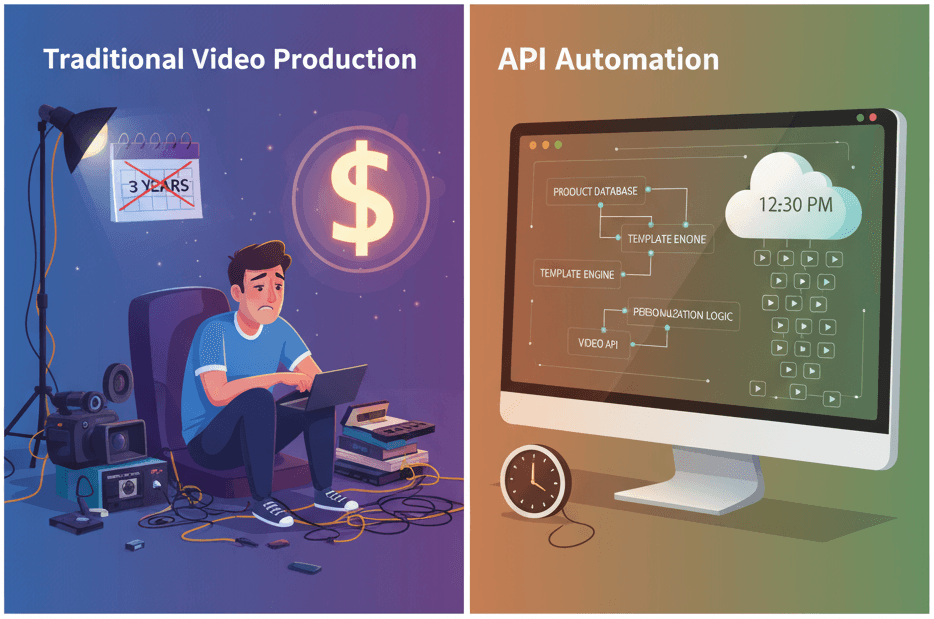
That's not hypothetical. Zapier processes over 1.5 billion automated tasks per month, a 60% increase since 2023 (Fueler.io, 2026). Businesses are automating everything — and video creation is the next frontier. We've covered the economics of this shift in our video API vs. traditional production cost comparison.
Here's what an automated video workflow actually looks like:
- A trigger fires — new form submission, CRM update, spreadsheet row, Shopify order
- Zapier catches it and pulls the relevant data (name, company, product, etc.)
- Renderly receives the data and renders a personalized video from your template
- The finished video gets delivered — emailed, uploaded to a drive, posted to Slack, whatever you want
No human touches the video. No one opens an editor. The entire pipeline runs on its own.
What You'll Need Before You Start
Before we get into the step-by-step, here's your quick checklist. The whole setup takes about 10 minutes if you have these ready:
- A Renderly account — Sign up at renderly.video if you haven't already. You'll get starter credits to test with.
- A Renderly API key — Go to your dashboard, then Settings → API Keys. Copy it somewhere safe.
- A Zapier account — Free tier works for testing, but you'll want a paid plan for production workflows (Zapier's free tier limits you to 100 tasks/month).
- A video project or template — Either create your own project in Renderly with dynamic overlays, or use one of the system templates. We'll cover both options.
That's it. No SDKs to install, no servers to configure. Everything runs through Zapier's visual builder and Renderly's cloud rendering.
A Quick Note on Dynamic Variables
This is the part that makes automation powerful. In Renderly, any overlay (text, image, video) can be marked as dynamic — meaning its content gets swapped out automatically at render time.
So if you have a welcome video template with a "name" text overlay marked as dynamic, you can send "name": "Sarah" through Zapier and get a video that says "Sarah" instead of the placeholder. Same template, infinite variations.
Step 1: Connect Renderly to Zapier
93% of video marketers say video gives them a positive ROI (Wyzowl, 2025). Getting that ROI starts with connecting the tools. Here's how to link Renderly to your Zapier account:
- Log into Zapier and click "Create a Zap" (or "Create" → "Zaps" from the sidebar)
- Search for "Renderly" in the app search bar when adding a trigger or action
- Click "Connect" when prompted to authenticate
- Paste your API key — the one from your Renderly dashboard under Settings → API Keys
- Zapier verifies the connection — you'll see your email and credit balance displayed as a confirmation
That's your connection established. You only need to do this once — Renderly is officially listed in the Zapier App Directory, so the connection flow is fully supported. Every future Zap you build will use this same connection.
Pro tip: If you're building workflows for a client or team, create a dedicated API key for Zapier. That way, you can revoke it independently without breaking other integrations.
Step 2: Choose Your Trigger (What Starts the Video)
Now for the fun part — deciding what event should kick off a video render. This is the "when" of your automation. Zapier connects to over 7,000 apps, so the possibilities are wide open.
Here are the most popular triggers we see Renderly users set up:
| Trigger App | Event | Use Case |
|---|---|---|
| Google Forms | New form submission | Personalized thank-you videos for survey respondents |
| HubSpot | New contact created | Welcome videos for new leads |
| Shopify | New order | Product unboxing or confirmation videos |
| Google Sheets | New row added | Batch video generation from spreadsheet data |
| Typeform | New entry | Personalized response videos |
| Stripe | New payment | Customer thank-you videos |
| Calendly | New booking | Pre-meeting intro videos |
Pick your trigger app and event. For this walkthrough, I'll use Google Sheets → New Spreadsheet Row since it's the most versatile. You can swap data into a sheet from almost anywhere.
Configure the Trigger
- Select Google Sheets as your trigger app
- Choose New Spreadsheet Row as the trigger event
- Connect your Google account (if you haven't already)
- Select the specific spreadsheet and worksheet
- Test the trigger — Zapier will pull in a sample row so you can see the available fields
Your spreadsheet should have columns that match your video's dynamic variables. For example: name, company, role, product_url.
Step 3: Set Up the Renderly Action (Create Video Render)
Here's where you tell Zapier what to do when the trigger fires. We're going to add Renderly's Create Video Render action.
- Add a new action step — Click the "+" below your trigger
- Search for "Renderly" and select it
- Choose "Create Video Render" as the action event
- Select your connection (the one you set up in Step 1)
Now you'll see the configuration screen. This is where it gets interesting.
Choose Your Render Source
You've got two options:
Option A: Render from Your Project
- Select "My Project" from the "Render From" dropdown
- Zapier fetches your projects and shows them in a dropdown
- Pick the project you want to render
- Zapier automatically loads all the dynamic variables from that project as input fields
Option B: Render from a System Template
- Select "System Template" from the "Render From" dropdown
- Browse the available public templates
- Select one, and Zapier loads its dynamic variables as input fields
Map Your Dynamic Variables
This is the magic step. For each dynamic variable field that appears, map it to data from your trigger.
For example, if your trigger pulls in a Google Sheets row with a "Name" column, and your Renderly project has a dynamic text overlay called "name":
- Click into the "name" field in the Renderly action
- Select the Name field from your Google Sheets trigger data
- Repeat for every dynamic variable — company, product image URL, headline, whatever your template uses
Every video that gets rendered will pull fresh data from whatever triggered the Zap. Different row, different video. Same template, zero manual effort. For a deeper look at scaling this approach, see our guide on generating 1,000 personalized videos with API automation.
Optional: Add a Webhook URL
If you want to know when the video finishes rendering (spoiler: you probably do), add a webhook URL in the optional field. This lets you chain additional actions — like emailing the video or uploading it to a drive — after the render completes.
But there's an even easier way to handle this. Keep reading.
Step 4: Add a Completion Trigger (Get Notified When the Video Is Ready)
Renderly's Zapier integration includes a Render Completed trigger — a webhook-based trigger that fires the instant your video finishes rendering. Here's how to use it in a multi-step Zap:
The no-code market is projected to hit $52 billion by 2026, growing at 28% CAGR (Gartner via Kissflow, 2026). Renderly's Zapier triggers are built for this no-code-first world. You don't need to manage webhook endpoints manually — Zapier handles the subscription automatically.
Within the same Zap or a separate Zap:
- Create a new Zap (or add to an existing multi-step Zap)
- Set the trigger to Renderly → Render Completed
- Connect your Renderly account
- Test the trigger — it will pull in a sample completed render
The trigger gives you access to:
- Output URL — the direct link to your finished video file
- Render ID — for tracking and reference
- File size — useful for validation
- Credits consumed — so you can monitor usage
There's also a Render Failed trigger if you want to set up error handling (and you should). It fires when something goes wrong, giving you the error details so you can alert your team or retry.
Step 5: Deliver the Finished Video
Once the render completes, you need to actually do something with the video. This is where you add your delivery step — the final action in your Zap.
Popular delivery options:
Send via Email (Gmail, Outlook, SendGrid)
Add a Gmail → Send Email action after the Render Completed trigger. Map the video URL into the email body. You can even personalize the subject line and body text using the same trigger data.
Upload to Cloud Storage (Google Drive, Dropbox, S3)
Add a Google Drive → Upload File action. Use the video output URL as the file source. Great for building a library of rendered videos your team can access.
Post to Slack or Teams
Add a Slack → Send Channel Message action. Include the video URL in the message. Perfect for internal review workflows or celebrating new customer wins.
Push to Your CRM (HubSpot, Salesforce)
Add a HubSpot → Create Engagement action. Attach the video URL to the contact record. Your sales team sees personalized videos right inside their CRM.
The point is — once the video URL hits Zapier, you can route it anywhere. Chain multiple delivery steps if you need to. Email the customer AND log it in your CRM AND post a notification to Slack. All automatic.
Real-World Workflows You Can Build Today
Personalized videos show 16x higher click-to-open rates than generic ones and can boost conversions by up to 500% (Tavus, 2025). Here are concrete workflows that take advantage of that:
1. Personalized Welcome Videos for New Signups
Trigger: New user in your CRM or auth system Template variables: First name, company name, plan type Delivery: Email via SendGrid or Gmail
Every new customer gets a video that says their name, mentions their company, and highlights features relevant to their plan. Takes 5 minutes to set up. Runs forever.
2. Product Showcase Videos from Shopify
Trigger: New product added in Shopify Template variables: Product name, product image, price, description Delivery: Upload to Google Drive + post to social media scheduler
New product listing goes live → video gets created automatically → ready for social posting. Your marketing team never touches a video editor.
3. Real Estate Property Tour Videos
Trigger: New row in Google Sheets (from listing data feed) Template variables: Address, price, bedroom count, hero image Delivery: Email to agent + upload to property listing platform
Agents paste listing data into a sheet, and polished property videos appear in their inbox. This one's been a hit with real estate teams using Renderly.
4. Sales Outreach Videos from CRM Updates
Trigger: Deal stage changes in HubSpot or Salesforce Template variables: Contact name, company, deal value, rep name Delivery: Email to the contact + log in CRM
When a deal moves to "proposal sent," a personalized video follows up automatically. Your rep's face (or name) is in the video. The prospect feels like someone made it just for them. Because technically, something did.
5. Event Recap Videos from Form Responses
Trigger: Post-event survey submitted via Typeform Template variables: Attendee name, event name, highlight quote Delivery: Email to attendee + upload to shared drive
Each attendee gets a personalized recap video with their name and a quote they submitted. Great for conferences, webinars, and workshops.
Tips for Getting the Most Out of Your Automation
67% of marketers who don't currently use video plan to start in 2026 (Wyzowl, 2026). If you're ahead of the curve with automation, here's how to stay there:
Design your templates for automation first. Think about what data you'll have available when designing your dynamic overlays. If your trigger only gives you a first name and email, don't design a template that needs 15 variables.
Test with real data before going live. Zapier's test feature sends a real render request. Use it. Check that your variables map correctly and the output video looks right.
Set up error handling. Add the Render Failed trigger to a separate Zap that sends you a Slack notification or email. You'll want to know immediately if something breaks — not three days later when a customer complains.
Monitor your credit usage. Each render consumes credits based on video duration and resolution. The Render Completed trigger includes credits consumed, so you can track usage per workflow. Set up a monthly summary if you're running high-volume automations.
Use Zapier's built-in tools. Formatter steps can clean up data before it hits Renderly. Use "Text → Titlecase" to fix inconsistent name formatting, or "Numbers → Format Number" for currency values in your videos.
What About Make and n8n?
Renderly isn't just on Zapier. We also support Make (formerly Integromat) for more complex visual workflows, and n8n for self-hosted automation. But Zapier is the best starting point if you want the fastest setup with the largest app ecosystem.
If you're already deep into another automation platform, the same principles apply — trigger, render, deliver. The API endpoints are identical — check out our comparison of the best video APIs for developers for more on what's available. Only the platform-specific configuration differs.
Frequently Asked Questions
How long does a Zapier-triggered video take to render?
Most renders complete in 30 seconds to 3 minutes, depending on video length and complexity. Renderly's cloud rendering scales automatically, so you won't hit bottlenecks even with dozens of concurrent renders. The Render Completed trigger fires the instant it's done.
How many credits does each automated render consume?
Renderly uses a simple credit system: 1 credit per minute of 1080p video. A 30-second video costs 0.5 credits. You can monitor usage directly in Zapier — the Render Completed trigger returns the exact credits consumed for each job.
Can I use Zapier's free plan for video automation?
You can test the integration on Zapier's free tier, which allows 100 tasks per month. For production workflows, you'll need a paid Zapier plan. Each Zap run that triggers a render counts as one task, and the Render Completed callback counts as another.
What happens if a render fails?
Renderly's Render Failed trigger fires automatically with error details. Set up a Zap that sends you a Slack or email notification when this happens. Common failure reasons include invalid media URLs in your replacements or expired asset links.
Can I render different templates based on conditions?
Yes — use Zapier's built-in Paths feature (available on Professional plans and above). You can route to different Renderly actions based on conditions. For example: if the contact's industry is "Real Estate," use Template A. If it's "E-commerce," use Template B.
Start Automating Your Video Pipeline
Setting up automated video creation with Zapier and Renderly takes about 10 minutes. You pick a trigger, connect your template, map your data, and let it run. Every new row, form submission, or CRM event produces a finished, personalized video — without anyone touching an editor.
If you don't have a Renderly account yet, sign up at renderly.video to get started with free credits. The Zapier integration is live in the Zapier App Directory, so you can find it by searching "Renderly" inside any Zap.
And if you build something cool with this, I'd genuinely love to hear about it. Drop us a line at support@renderly.video.
Happy automating.
Related Articles

Renderly Is Now Officially Listed on the Zapier App Directory
Renderly's Zapier integration is now publicly available in the Zapier App Directory. Connect video rendering to 7,000+ apps — no invite link needed.
March 31, 2026
How to Generate 1,000+ Personalized Videos with API Automation (2026 Update)
Personalized videos convert at 3x the rate of generic ones (Tavus, 2025). This developer guide shows how to build a bulk video generation pipeline using REST APIs — 1,000 videos in under 20 minutes at $0.10–0.50 each.
May 18, 2026